Spend Over $175 To Receive Free Shipping, Use Code FREESHIP175 At Checkout. *Valid For USA Addresses Only

BB&L Blog

RSS
A Guide to the Best Before & After Pictures

A Guide to the Best Before & After Pictures 0

Are you having troubles capturing your client’s before and after photos so that people can really see the transformation? If so, this one’s for you!

Take a quick look at these simple tips designed to help you get the best before and after pictures of your lash and brow treatments (or other procedures).

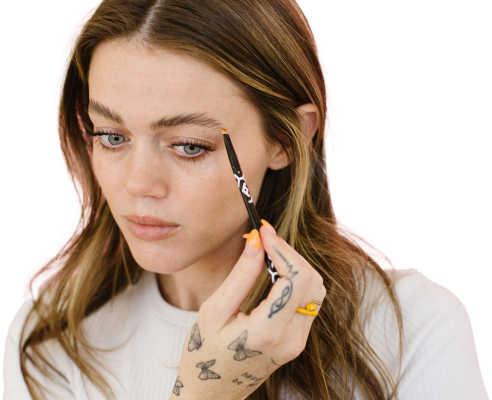
A Guide to the Best Before & After Pictures Blog | Beautiful Brows & Lashes

Clear the Area

We don’t mean the background behind you but the facial area. Things like makeup and hair can easily take away from your pictures. You don’t want distracting details so go ahead and pull the hair back or at least get it out of the way.

It’s also a good idea to remove any makeup, or at least make sure the makeup is identical in both pictures. We recommend removing makeup because it will make the contrast of the before and after far more noticeable.

Lighting & Background

You really want to focus in on the face but again, you don’t want other distractions. When you’re preparing for the photos, make sure you have good lighting that will highlight the face of your customer.

You can use a background lamp or something like a selfie ring light to help out with the lighting. You also want a fairly clear background. Whether you use a neutral-colored wall or take their picture from your chair, just be sure there isn’t a lot of background showing or distractions in the background.

A Guide to the Best Before & After Pictures Blog | Beautiful Brows & Lashes

Take a Full Photo

For this purpose, you’re most likely trying to capture your client’s brow lamination or lash lift, right? Here’s the thing. You don’t just want their brows or their lashes in the photo, you want a full portion of their face.

You can take a full face photo up close. You can also take a photo that includes the full top half of the face up close. We’re talking the nose area up to the hairline. This captures everything, gives a facial surrounding, and clearly shows the transformation.

Making sure you capture other portions of the face also tells the people seeing the photo that those results are from a real person and it is in fact the same person in both photos.

Repetitive Consistency

If you’re working to create a steady number of before and after photos to show off, we recommend being consistent with how you take photos. Decide your setting and background and decide how much of the face you plan to include.

Try to take similar photos with each client. It’s ok if you use a couple of different methods but for the most part, you should be repetitive for equal comparison purposes.

A Guide to the Best Before & After Pictures Blog | Beautiful Brows & Lashes

Summary

Taking before and after pictures is harder than it sounds! But if you know the proper tips, you will have the perfect photos of your clients to share with everyone else and attract new clients. Just be sure that you always share high-quality photos and take a few steps to get them looking.

The proof is in the little details!

  • Sara Millecam
Which Tool is Best for Lash Lifting and Brow Lamination?

Which Tool is Best for Lash Lifting and Brow Lamination? 1

When you’re working endlessly for the benefit of your customers, it’s important to know your options. There are tons of products out there that you can use for things like lash lifts and brow laminations but how do you know which ones are really helpful? 

Which Tool is Best for Lash Lifting and Brow Lamination Blog | Beautiful Brows & Lashes

Check out these awesome tools that you can use for lash lifting or brow lamination needs.

Here are a few of our top recommendations.

  • Eyelash Separating Tool
  • Mascara Wands
  • Mini Mascara Wands
  • Lash Mirror
  • Y-Combs
  • Micro Applicators
  • Lash & Brow Comb
  • Protective Eye Guard

Many of these can be used for brows or lashes but don’t worry, we’re going to give you a brief explanation of each one.

Eyelash Separating Tool

The eyelash separating tool is great for your lash lift clients. It has a soft grip so you can be comfortable while you work. This little tool will help you lift and separate the lashes to get the perfect and precise look.

The body of the tool is made with lightweight aluminum. It’s built to be professional quality so you can do a professional lash lift.

Which Tool is Best for Lash Lifting and Brow Lamination Blog | Beautiful Brows & Lashes

Mascara Wands & Mini Mascara Wands

We have both mascara wands and mini mascara wands. While you might automatically think a mascara wand would just be for lash lifts, you can actually use these for brow laminations too.

Use the appropriate size of mascara wand to separate, define, and groom hairs before, during, and after your treatments for your clients.

Mini Mascara Wands | Beautiful Brows & Lashes

Lash Mirror

The lash mirror gives you the ability to see what’s happening while you work your magic on your client. Our mirror is made with high-quality stainless steel. It gives you a visual from both above and below the lashes.

The lash mirror might help you be more precise and accurate with your work thanks to a full view. Pre-order yours now if you haven’t already!

Eyelash Mirror | Beautiful Brows & Lashes

Y-Combs

Our Y-Comb is a new addition to the tools. It’s lightweight and so easy to use and hold. This tool was designed to be an alternative to the lash lifting tool and can be used with brows and lashes. It helps to brush the lashes and brows into place during the treatment process.

It's lightweight and precise and it’s also a disposable tool.

Pink Y- tool applicators | Beautiful Brows & Lashes

Micro Applicators

Never do a lash lift or a brow lamination without our sterilized micro applicators nearby. These sterilizers are lint-free and versatile tools. The heads are small so when you’re applying or removing liquid or chemicals, you have perfect control while you work.

Get a pack of 100 disposable micro applicators.

Disposable Micro Applicators | Beautiful Brows & Lashes

Lash & Brow Comb

Check out the double-sided lash and brow comb. This tools helps with grooming lashes and brows. You can use one side to brush and groom and the other side to separate and comb. It’s the perfect multi-functional device.

Pink Lash & Brow Comb | Beautiful Brows & Lashes

Protective Eye Guard

It can be really hard to work on lower lashes and not get tint or mascara on the skin under the eye. But not anymore with new protective eye guards. These clear units are lightweight and small enough to comfortably protect your client while you work. They are re-usable, easy to clean, and so very helpful to avoid messes!

You will find all of these tools and more available to you. They all can be very helpful and the little tools are really an affordable way to perfectly enhance your experience as well as your client’s.

Protective Eye Guard | Beautiful Brows & Lashes


  • Sara Millecam
The Difference Between Tint and Henna

The Difference Between Tint and Henna 0

Are you undecided on whether you want to use tint or henna for your brow game? Maybe understanding the differences will help with just that decision.

Take a look at this quick guide to uncover the differences between tint and henna.

Tint

Tint is used to dye the hairs, in a sense. It works very similarly to hair dye and will ultimately add a tint of color to the hairs that it is applied to. This tinting process generally lasts for anywhere from 2-6 weeks, depending on the products and on your brows.

If you have great shape already and you just want to add some color, tinting is a really great option. The change that tint brings to the brow game is somewhat subtle but still gives your brows an improved and enhanced look.

Tinting is perhaps one of the more popular solutions. It’s great for enhancing your brows to make them darker while also making them appear thicker and longer when the tint is applied.

When applying tint, you may have to use an activator for the color.

The Difference Between Tint and Henna Blog | Beautiful Brows & Lashes

Henna

Now, when you look at henna, you see that they are somewhat similar products. And yet, they are very different at the same time.

Henna has a more permanent look and tends to be more dramatic in the end. When henna is used, it stains the skin and the hairs, rather than just the hair. Because it stains the skin, henna tends to last slightly longer and may last up to 8 weeks.

Henna can be useful if you have thin brows or perhaps have a lot of patchy areas that need to be filled in more. It is more permanent and often times more noticeable because the solution stains the skin.

Henna does not usually require chemical activation but often uses distilled water to activate.

The Difference Between Tint and Henna Blog | Beautiful Brows & Lashes

So, which is Better?

Whether you decide to use tint or henna will really depend upon your brow needs and what you are looking for in the end result. You might even be able to use tint and then follow up with henna several days later. However, this is not always an option so be sure to visit with your esthetician to find out your options.

Ultimately, the biggest difference is that tint is more subtle when applied. It tints only the hair and provides a natural shading to enhance and improve your brows. Henna is slightly longer lasting but also more prominent when applied.

The real question is, are you going for a dramatic and noticeable change or do you want a look that is subtle and natural?

The Difference Between Tint and Henna Blog | Beautiful Brows & Lashes

Can You Combine Tint and Henna?

There are times when tint and henna might be able to be used together but not typically at the same time.

For example, with a brow bomb, you need to wait at least 48 hours before applying henna afterward. We actually recommend waiting more like 7 days. This is because the solution in a brow bomb really doesn’t combine well with henna.

Whatever process you choose for your brows, be sure to work with a skilled and knowledgeable brow professional.

  • Sara Millecam
How to Avoid Over-Processing for Your Brow and Lash Clients

How to Avoid Over-Processing for Your Brow and Lash Clients 0

When you get a brow lamination or lash lift done by a professional, you expect professional results, right? Of course, we all make mistakes but we certainly want to learn how to avoid some of the most common mistakes so that we can take the best care of our clients.

One common mistake is over processing. Unfortunately, once over processing has occurred, there’s very little you can do but wait it out. So how can you avoid it?

We’ve got some tips for you!

Over Processing and How to Avoid It Blog | Beautiful Brows & Lashes

What is Over Processing?

Over processing is pretty self-explanatory. It means that you have left a solution on your client for too long. The solution processed for longer than it should have and this often leads to things like unwanted curling or perhaps frizzing.

Over processing doesn’t just apply to your brows. Hair treatments, brow treatments, and lash treatments can all be over processed if you are not careful.

Sometimes, the side effects of over processing won’t show up right away. It may take up to 24 hours to see those indicators.

What Do You Do?

If you over processed a client, your client is going to have to act to help the situation. Sadly, it reflects poorly on you. When over processing happens, you can’t undo it. There are things that you can do to try to help the situation but just know it won’t reverse the over processing.

The best thing to do is to immediately apply castor oil to the area that was over processed. If you notice this while the customer is in your care, you should immediately apply castor oil for them or you can use Lash Toxx if you have that on hand.

If the client notices it after they have left, they can also use the same approach to help. If they have neither of these available, they can use hair conditioner instead.

This will require more than one-time application. They should reapply castor oil, or whatever they used often and probably for several days. The hairs will then improve over time.

Over Processing and How to Avoid It Blog | Beautiful Brows & Lashes

Avoiding Over Processing

The very best thing that you can do is practice and learn to pay very close attention to processing times. Sometimes it just takes practice but follow instructions closely for whatever process you are doing and time it out if you need to!

When you use these processes, make sure you are not using saran wrap as this is more likely to lead to over processing. You should use bonder to prevent over processing as well.

If you’re using kits from Beautiful Lashes and Brows products, like the Brow Bomb kit, you also want to be careful with the steps. For example, when applying Step 1 try to avoid getting the solution on the tips of the brow hairs.

Remember that different types of hair might process differently so time on the low side as you get to know how different hair reacts. You will improve and learn tips over time as you get used to doing these processes.

  • Sara Millecam
Pregnancy & Lash Lifting: Is it Safe?

Pregnancy & Lash Lifting: Is it Safe? 0

Being pregnant can be challenging enough. There are so many do's and don'ts to consider throughout pregnancy and it's sometimes very challenging to know what you are or are not allowed to do. 

As women, we often have our routines for beauty and unfortunately, many of those things are not recommended for use when you are pregnant. 

One of the most common questions about pregnancy and our products is whether or not a woman can get a lash lift during pregnancy. 

While we would love to tell you to continue your normal beauty routine, the truth is that our lifting products (and most beauty products out there) have not been officially tested on pregnant or breast feeding women. 

Pregnancy & Lash Lifting | Beautiful Brows & Lashes

Lash Lift Risks

In general, lash lifts are considered to be very low risk procedures. However, the challenge occurs when you consider that a woman's body undergoes massive changes when experience pregnancy. 

A pregnant woman experiences hormonal and emotional changes as well as physical changes and it is up to them to nurture and care for that beautiful life inside. While it might seem like getting your lash lift is no big deal, sometimes it simply isn't worth the risk. 

You will find sources that tell you there is no harm in continuing lash lifts once you've passed the first trimester. Ultimately, the decision is up to you. We simply don't recommend it. Our recommendation is based on taking the utmost care to the changes that a pregnant woman may be facing and not placing the woman or their baby at risk! 

Here are some of the most basic possible risks for lash lifts, not considering pregnancy. 

  • Over-curled lashes
  • Lashes too straight
  • Chemical irritation
  • Infections
  • Damaged natural lashes 

Our Lash Bombs are designed to keep your eye and your natural lashes healthy but because there are chemicals and you're in the hands of varying professionals, the results are not always perfect. 

Always choose a skilled professional that you trust. It's a good idea to check you their work and be sure they have a track record of success. Look for skills and training to know they have done the procedure before. 

If you are pregnant and still considering a lash lift, you may want to wait. Otherwise, we do recommend at least having a conversation with your doctor to err on the side of caution. 

Always play it safe - your lashes will be waiting when you are ready! 

  • Sara Millecam
Lash Shields vs Lash Rods: Which is Better?

Lash Shields vs Lash Rods: Which is Better? 0

Learn whether lash shields or lash rods are the best for you.
  • Sara Millecam